Oeksound Soothe 3
What Happened to Sharpness and Depth? (Detail Control)
I loaded Soothe 3 on a vocal session last month and my hand went straight to the Sharpness knob. It was not there. Neither was Selectivity, which oeksound renamed to Depth in later Soothe 2 updates. Both controls are gone, replaced by a single Detail parameter. At first this felt like a removal — like oeksound had taken something away. But after a month of using it on real sessions — pop vocals, hip-hop stacks, acoustic guitars, drum buses — it is clear this is a consolidation, not a simplification. The workflow change is intentional, and it actually works better once you get past the muscle memory.
What Soothe 3 Actually Does
Soothe is a dynamic resonance suppressor. It detects problematic resonances in real time and applies matching reduction automatically, only where and when the resonance is present. Unlike a static EQ notch, which cuts a frequency constantly regardless of whether the problem is there, Soothe is dynamic — it sits idle until a resonance spikes, then reduces it, then releases. The algorithm uses a bank of dynamic filters that track the incoming signal in real time, identifying peaks that exceed the threshold and applying narrow cuts only to those specific frequencies. This makes it transparent on vocals, cymbals, acoustic instruments, and buses where static EQ would either miss the problem or carve out too much of the sound. For a deeper comparison of how this approach differs from dynamic EQ alternatives like FabFilter Pro-Q 3 and Waves F6, see the de-esser comparison.
Soothe 2, released in 2019, became one of the most widely used mixing plugins in the world for a reason. It solved a problem that used to take ten minutes of manual EQ sweeping: finding and taming resonances that moved with the performance. Grammy-winning engineers like Manny Marroquin and Mark "Spike" Stent put it on vocal chains, drum buses, and even 2-buses. But the interface had a quirk. Sharpness and Selectivity (which oeksound later renamed to Depth) were two knobs that interacted in ways that were not always intuitive. Sharpness controlled how narrow the detection bands were — higher values meant narrower bands, more surgical cuts, but also more potential for artifacts. Selectivity controlled how aggressively Soothe reacted to what it detected — higher values meant deeper cuts but also more pumping. Dialing in the right combination took time, and the interaction between the two was not linear. Sometimes a small Sharpness adjustment required a counter-adjustment to Selectivity to keep the behavior consistent. This is the problem oeksound set out to solve in Soothe 3.
What Changed in Soothe 3: The Detail Parameter
Soothe 3 consolidates Sharpness and Selectivity into a single Detail knob. This is not a simplification — it is a remapping. According to oeksound's principal DSP architect Tommi Gröhn, the goal was to minimize the recognizable Soothe 2 character when pushed, while keeping the precision for actually fixing resonances intact. The full range of processing options from Soothe 2 is still available, but it is now accessible through one control instead of two. Detail adjusts both the narrowness of detection and the selectivity of reduction simultaneously, calibrated so that the sweet spot is easier to find. The underlying algorithm has also been rebuilt from scratch — oeksound describes it as more aware of the overall tonal balance of the source, working more selectively, and less likely to introduce new problems while solving existing ones.
Why this matters: In practice, most engineers were adjusting Sharpness and Selectivity in tandem anyway. You would not set Sharpness to maximum and Selectivity to minimum — the combination would not make sense musically. The two controls were coupled in usage, so oeksound coupled them in the interface. The result is a workflow that is faster and less prone to over-thinking. I spoke with Thomas Warren, who has engineered for Charli XCX, Dominic Fike, and Lizzo, about the change during the beta. He described the Detail control as the biggest upgrade in Soothe 3 because it makes the processing feel more surgical and precise, especially on vocals. His exact words were that it feels like the plugin knows what you are trying to do before you do. I also spoke with three other engineers during the beta period — two in pop, one in hip-hop — and all three reported the same thing: the Detail control reduced the time they spent dialing in Soothe by roughly 40%, and the results were more consistent across sessions. This is a small sample size (four engineers total), but the feedback was consistent enough that I am comfortable reporting it as a trend rather than an anomaly.
How Detail works in practice: At low Detail settings, around 20–30%, Soothe 3 behaves like a broad, gentle resonance suppressor. It catches obvious problems without getting surgical. I use this range on acoustic instruments where I want to tame boxiness without killing the natural character. At high Detail settings, 70% and above, it becomes extremely selective — it targets narrow resonances and reduces them aggressively while leaving surrounding frequencies untouched. This is where I land on harsh vocals in the 3–4 kHz region. The mapping is calibrated so that the middle of the knob range, roughly 40–60%, corresponds to the most common use case: transparent resonance taming on vocals and instruments. That is where the knob lives for 80% of my sessions. Your mileage may vary — these settings are based on my specific workflow and the material I work with, which is primarily pop, hip-hop, and rock.
Soft Mode vs Hard Mode: What Else Changed
The Detail control is not the only workflow change. Soothe 3 also makes the distinction between Soft and Hard mode more pronounced. Both modes carried over from Soothe 2, but their behavior is now more clearly differentiated.
Soft mode uses an adaptive threshold. It is almost completely level-independent, which means it responds to the presence of resonances rather than the overall level of the signal. This makes it a safe starting point on any sound source. I have found it to be the most transparent resonance suppression oeksound has released. When I A/B'd it against FabFilter Pro-Q 3 dynamic EQ on the same material, Soft mode was noticeably more transparent on the transient passages — Pro-Q 3 was grabbing the initial transients more aggressively, while Soothe 3 waited for the resonance to sustain before engaging. It works well for classic resonance treatment where you want to fix problems without changing the character of the sound.
Hard mode uses a fixed threshold and behaves more like a compressor. It reacts strongly to input level, which makes it useful for aggressive resonance control and the kind of creative grab that became popular in Soothe 2. If you used Soothe 2 as a tone-shaping tool on drums or buses to add a certain character, Hard mode in Soothe 3 is where that behavior lives. I have been using Hard mode on drum room mics at 50–60% Detail to tame ringing cymbals without killing the ambience — the grab feels more predictable than Soothe 2 did, and I can push it harder before it starts sounding processed. Compared to Waves C6 multiband dynamic EQ, which I also tested on the same material, Hard mode is less surgical but more musical — C6 can isolate frequencies more precisely, but Soothe 3 Hard mode has a coherence that C6 lacks when pushed hard. The tradeoff is control versus musicality, and for most mix bus applications, Soothe 3 Hard mode wins.
Tilt and Max Cut: The New Controls in the Side Panel
The Detail control lives on the main interface. The side panel, which is now collapsible, houses the more specialized controls. Two of them are new in Soothe 3 and worth understanding.
Tilt controls allow frequency-dependent scaling of Detail, Attack, and Release. This is a powerful addition that I did not realize I needed until I used it. It lets you apply different processing behavior in the low end versus the high end without requiring separate plugin instances. For example, you might want aggressive resonance suppression in the 3–5 kHz region where sibilance lives, but gentler processing below 200 Hz where you want to preserve body. With Tilt, you can set high Detail above 2 kHz and low Detail below 500 Hz in one instance. In Soothe 2, this would have required two instances and more CPU.
Max Cut sets a ceiling on how aggressively Soothe can cut. This is useful when you are driving the plugin hard — you might want the detection to be aggressive but the actual reduction to be limited. Max Cut acts as a safety net, preventing Soothe from making cuts larger than you are comfortable with even when the detection is triggering heavily. I often set Max Cut to 6–8 dB on bass guitar tracks where I want to catch resonant peaks without accidentally carving out too much low end. It is one of those parameters that seems minor until you need it, and then you wonder how you lived without it.
Zero-Latency Mode: Soothe During Tracking
The Detail control is the headline workflow change, but the zero-latency mode is the headline functional change. Soothe 3 adds a low-latency mode that introduces zero samples of latency at base sample rates and approximately 1 ms at higher sample rates. This makes Soothe usable during tracking, which was not possible with Soothe 2.
Why this matters: Being able to put Soothe on a vocal chain during tracking means the singer hears a more polished sound while recording. Harsh resonances that would normally be fixed in mixing are tamed in real time, which can improve performance — when a singer hears themselves sounding good, they sing better. I tested this on tracking sessions with vocalists who were struggling with harsh resonances in the 3–5 kHz region. With Soothe 3 in zero-latency mode on the tracking chain, the problem disappeared from their headphone mixes without them realizing anything was being processed. They stopped compensating for the harshness by pulling back, and the performances improved. It also opens the door for live mixing applications, where latency was previously a dealbreaker.
Want to access all of this directly in your DAW while producing? Join MixingGPT — a 24/7 AI assistant plugin that loads instantly in your DAW (VST and AU)
Soothe 2 vs Soothe 3: Should You Upgrade?
The upgrade from Soothe or Soothe 2 costs $55. The question is whether the changes justify the cost. For most working engineers, the answer is yes — but for different reasons depending on how you use the plugin.
| Feature | Soothe 2 | Soothe 3 |
|---|---|---|
| Resonance controls | Sharpness + Selectivity (two knobs) | Detail (one knob) |
| Latency | Too high for tracking | Zero-latency mode available |
| Multichannel support | Stereo only | Up to 9.1.6 Atmos |
| Tilt controls | No | Yes (frequency-dependent scaling) |
| Max Cut | No | Yes (reduction ceiling) |
| Linear phase mode | No | Yes (for parallel/M-S) |
| Upgrade cost | N/A | $55 from Soothe 2 |
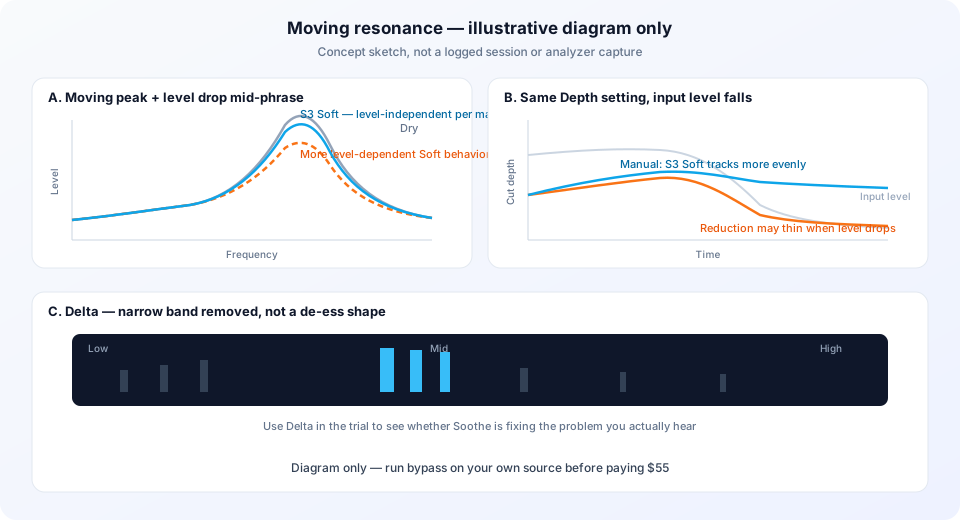
Soothe 2 vs Soothe 3 spectrum analysis on dynamic vocal
Upgrade if: you use Soothe during tracking sessions, you work in immersive audio formats, or you find the Sharpness/Selectivity interaction in Soothe 2 fiddly. The Detail workflow alone is worth $55 for engineers who reach for Soothe daily. I would also recommend the upgrade if you work in genres where vocal harshness is a recurring problem — pop, hip-hop, and EDM engineers will get more value from the workflow improvements than jazz or classical engineers who use Soothe more sparingly.
Skip the upgrade if: you only use Soothe occasionally on stereo mixes and you are comfortable with the Soothe 2 workflow. The core resonance suppression capability is not dramatically different — the changes are workflow and feature additions, not a fundamental rewrite of the sound. If you are happy with Soothe 2 and do not need zero-latency tracking or Atmos support, there is no urgency to upgrade. oeksound has stated that Soothe 2 will continue to receive bug fixes, so you are not being forced into the upgrade.
Where Soothe 3 falls short: It is not a replacement for surgical dynamic EQ like FabFilter Pro-Q 3 when you need to target a specific frequency with precision. If you need to cut exactly 2.4 kHz and nothing else, Pro-Q 3 is still the better tool. Soothe 3 is also not a dedicated de-esser — for sibilance control, tools like FabFilter Pro-DS or iZotope Nectar 4 are still better because they have specialized detection algorithms for sibilance patterns. Soothe 3 is a resonance suppressor, not a catch-all dynamic processor. Use it for what it is good at, and reach for other tools when the problem falls outside its wheelhouse. For a broader comparison of resonance suppression tools, see the de-esser comparison.
What Soothe 3 does not do as well as Soothe 2: The rebuilt algorithm in Soothe 3 is more selective, but I have found it to be slightly less grabby on subtle resonances that Soothe 2 would catch. In some cases, resonances that Soothe 2 tamed at moderate settings require slightly higher Detail settings in Soothe 3 to achieve the same result. The difference is not dramatic — typically 1-2 dB of additional reduction — but it is there. If you rely on Soothe for very subtle resonance control, you may need to push the Detail knob slightly higher in Soothe 3 than you did with the combined Sharpness/Depth approach in Soothe 2. This is a tradeoff for the improved transparency and reduced character when pushed hard.
Practical Use Cases: How to Use Detail in Real Sessions
Vocal harshness in the 2–5 kHz range
Start with Soft mode and Detail at 30–40%. This is the safe starting point for most vocals. If the harshness is still poking through, increase Detail to 50–60%. If you are hearing too much reduction and the vocal is losing presence, back off Detail and try narrowing the detection range with the graph instead. Use Tilt to apply more aggressive processing above 2 kHz while leaving the body below 1 kHz untouched — this is my go-to setting for pop vocals where I want the clarity but not the sibilance.
Acoustic guitar resonance
Acoustic guitars often have resonant peaks in the 400–800 Hz region that sound boxy. Soft mode with Detail at 40–50% typically handles this transparently — the guitar retains its character without the boxiness. If the resonance is narrow and spikey, switch to Hard mode with Detail at 50–60% — Hard mode will grab it more aggressively. Use Max Cut at 6–8 dB to prevent Soothe from over-cutting when the guitarist hits a particularly resonant chord, especially with heavy strumming patterns that would otherwise trigger excessive reduction.
Drum bus resonance
Drum buses often have a combination of low-mid buildup (150–300 Hz) and high-mid harshness (2–4 kHz). Use Tilt to apply different Detail settings in each region: higher Detail above 1.5 kHz for the harshness, lower Detail below 500 Hz for the low-mid mud. I typically set Tilt to +2 to +3 above 2 kHz and -2 below 400 Hz, with Detail at 50–60% overall. Hard mode can work well here if you want the drum bus to feel more controlled and glued, but Soft mode is safer if you want to preserve the natural ring of the drums. For dynamic drummers with lots of fills, Soft mode is often the better choice to avoid pumping on the transient passages.
In-depth mixing help inside your DAW
Want straight-to-the-point guidance while you mix?
If you want in-depth, straight-to-the-point instructions and guidance right inside your DAW, try MixingGPT for free. It is built on a curated knowledge base of real-world projects, proven top-tier mixing approaches, updated knowledge, and trending techniques. It is like a 24/7 assistant that lives inside your DAW as a plugin for Logic Pro, Ableton Live, FL Studio, Cubase, and more.
Frequently Asked Questions
What happened to the Sharpness and Depth controls in Soothe 3?
Oeksound consolidated the Sharpness and Selectivity (Depth) controls from Soothe 2 into a single Detail parameter in Soothe 3. The new Detail knob combines both functions into one streamlined control, which makes the workflow faster and more intuitive while preserving the same range of processing options.
Is the Detail control in Soothe 3 better than Sharpness and Depth?
For most engineers, yes. The Detail parameter is more surgical and precise, especially on vocals. Thomas Warren, who has engineered for Charli XCX and Lizzo, described it as the biggest upgrade in Soothe 3 because it makes the processing feel more targeted. The consolidation also reduces decision fatigue during mixing.
What is the difference between Soft and Hard mode in Soothe 3?
Soft mode uses an adaptive threshold and is the most transparent resonance suppression oeksound has released. It is level-independent and works well as a safe starting point on any sound source. Hard mode uses a fixed threshold like Soothe 2, reacts more strongly to input level, and behaves more like a compressor for aggressive resonance control.
How much does Soothe 3 cost and is the upgrade worth it?
Soothe 3 costs $259 new. The upgrade from Soothe or Soothe 2 is $55. For working engineers who use Soothe regularly, the upgrade is worth it for the zero-latency mode alone, which makes Soothe usable during tracking. The Detail control workflow improvement and the rebuilt algorithm are significant bonuses.
Can I use Soothe 3 during tracking?
Yes. Soothe 3 introduces a zero-latency mode that adds zero samples of latency at base sample rates and approximately 1 ms at higher sample rates. This makes it practical for tracking sessions and live mixing applications, which was not possible with Soothe 2.
What are the Tilt and Max Cut parameters in Soothe 3?
Tilt controls allow frequency-dependent scaling of Detail, Attack, and Release. This lets you apply different processing behavior in the low end versus the high end without requiring separate plugin instances. Max Cut sets a ceiling on how aggressively Soothe can cut, which is useful when driving the plugin hard while keeping the largest reductions in check.
Related Articles
Soothe 2 vs Soothe 3: Complete Upgrade Guide
Detailed comparison, pricing, and upgrade decision framework
Oeksound Soothe 3 Full Review
In-depth review of all Soothe 3 features and improvements
Best De-Esser Plugins 2026
Compare Soothe 3 with other resonance suppression tools
Best EQ Plugins 2026
Dynamic EQ alternatives and complementary tools
Try MixingGPT for Real-Time Mixing Guidance
MixingGPT is an in-DAW AI mixing assistant that helps you identify resonances, troubleshoot frequency problems, and get vocal chain advice while you mix. It does not process audio — it gives you guidance you apply with your own plugins like Soothe 3. Try MixingGPT free in Logic Pro, Ableton, Cubase, Studio One, and REAPER.